As I said in the previous post, I’ve finally jumped down the 3D printing rabbit hole, and it’s turning out to be both useful and fun. It’s also a gateway drug to other nerdy projects. While tuning the settings, I got interested in figuring out how high I could crank the printer’s resolution. After some research, I concluded that a good test would be printing some of the miniature figures used for tabletop games. All I needed to do was find some suitable figures that I could download for free.
In the typical way these things go, I soon found myself browsing various tabletop RPGs and wargames, and boy does that stuff run deep. I eventually emerged with some free figures designed for use with the nifty-looking One Page Rules wargame, and proceeded to print them.
Crucially, the printer I have is the common filament or fused deposition modeling (FDM) type, which is great for printing relatively large, practical objects. The conventional wisdom is that to print small, detailed stuff such as minifigures, one really should use the other major 3D printing technology, resin or stereolithography (SLA), which I don’t have. SLA provides much higher resolution, at the cost of smaller build volumes and weaker final products. In other words, these minifigures would be at the outside limits of my FDM printer’s capability, which made them perfect for testing it.
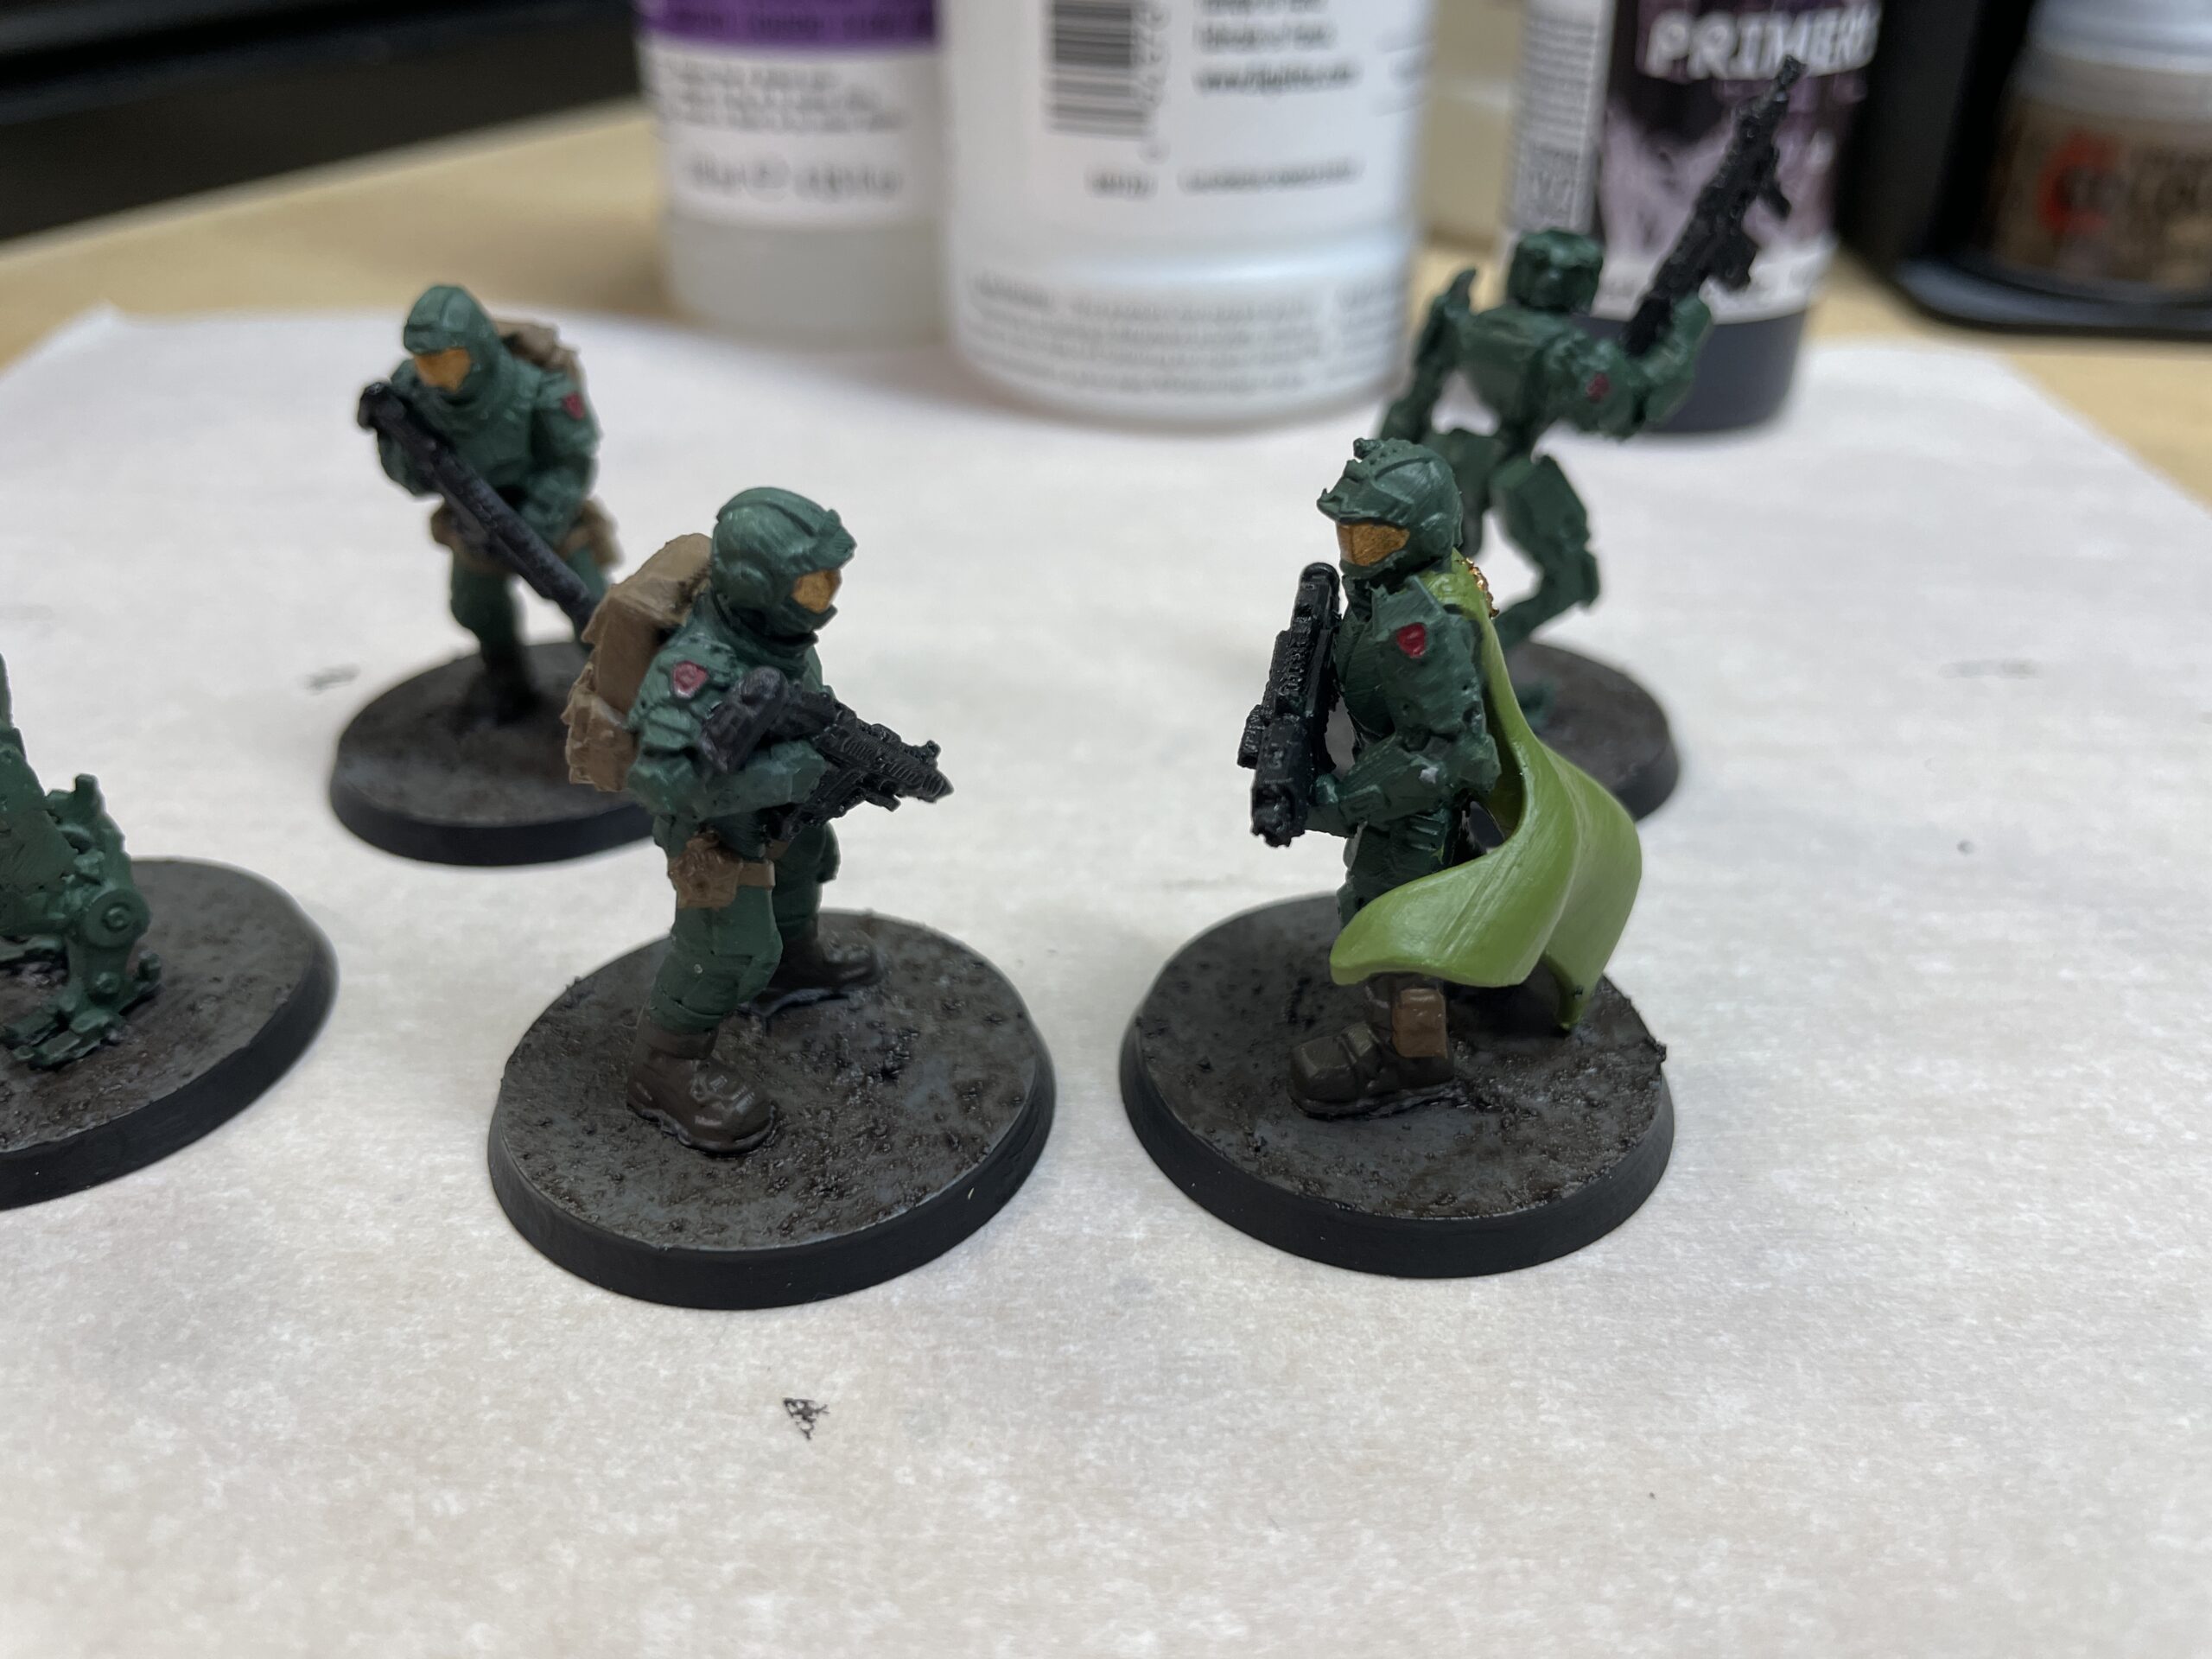
It worked, and soon I had a few somewhat decent-looking figures. The layer lines (limits of the printer’s resolution) were visible, but maybe they wouldn’t be after painting. So I needed to paint them.
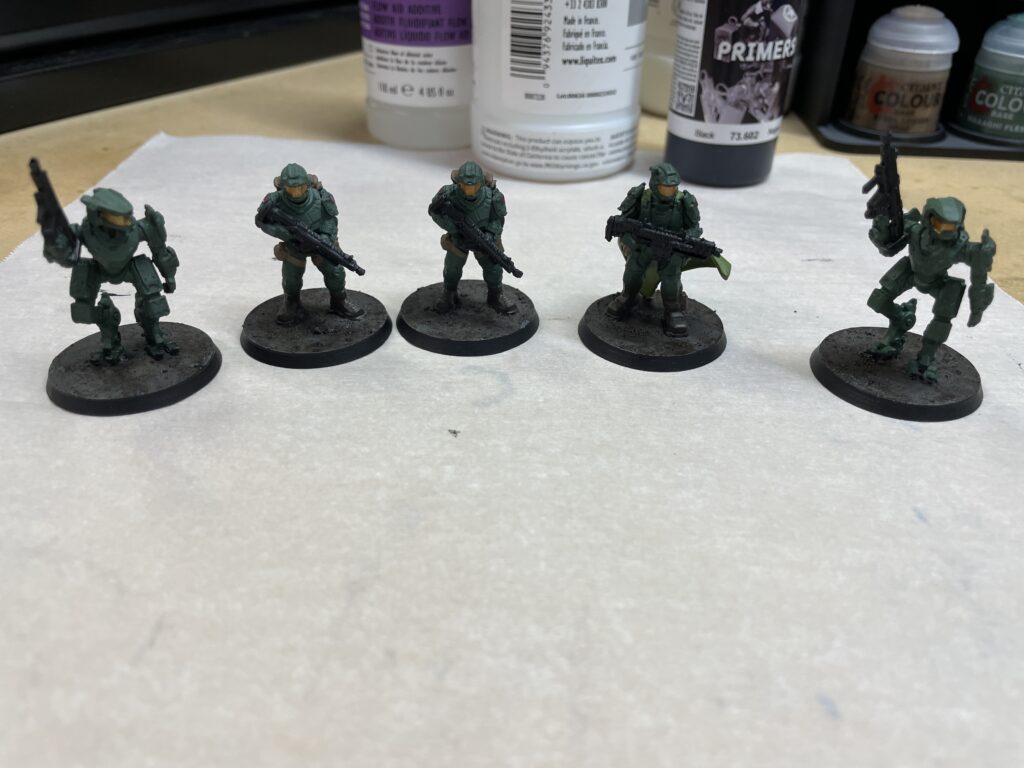
They turned out okay. These are 32mm scale, meaning they’re just over an inch tall. From the typical distances they’d be viewed during a game, the layer lines aren’t visible.
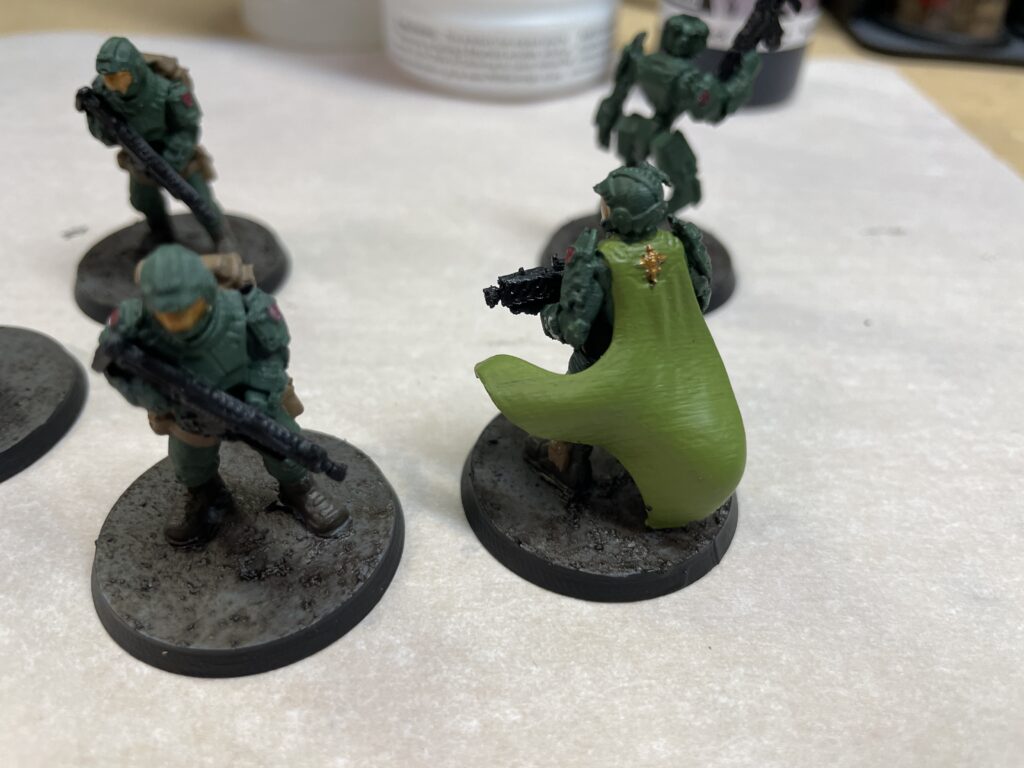
Up close, however, the printing artifacts are pretty clear. Large, smooth surfaces are the worst, such as this guy’s cloak.
For 3D printing nerds, this was with a 0.2mm nozzle and 0.06mm layer height, along with some other settings intended to make the surfaces as clean as possible. So this is the best case. I’m impressed that it turned out as well as it did, but if I decide to keep printing and painting small, detailed stuff like this, I’ll probably need to get a resin printer.
The other drawback to printing tiny details with FDM technology is that it takes a long time. Each of these figures took about two hours. On a resin printer, I could’ve printed all five of them in that time, with much better surface quality.
That said, my FDM printer is still great at making practical stuff, and I’m starting to learn how to do some minor customizations on prints I download.
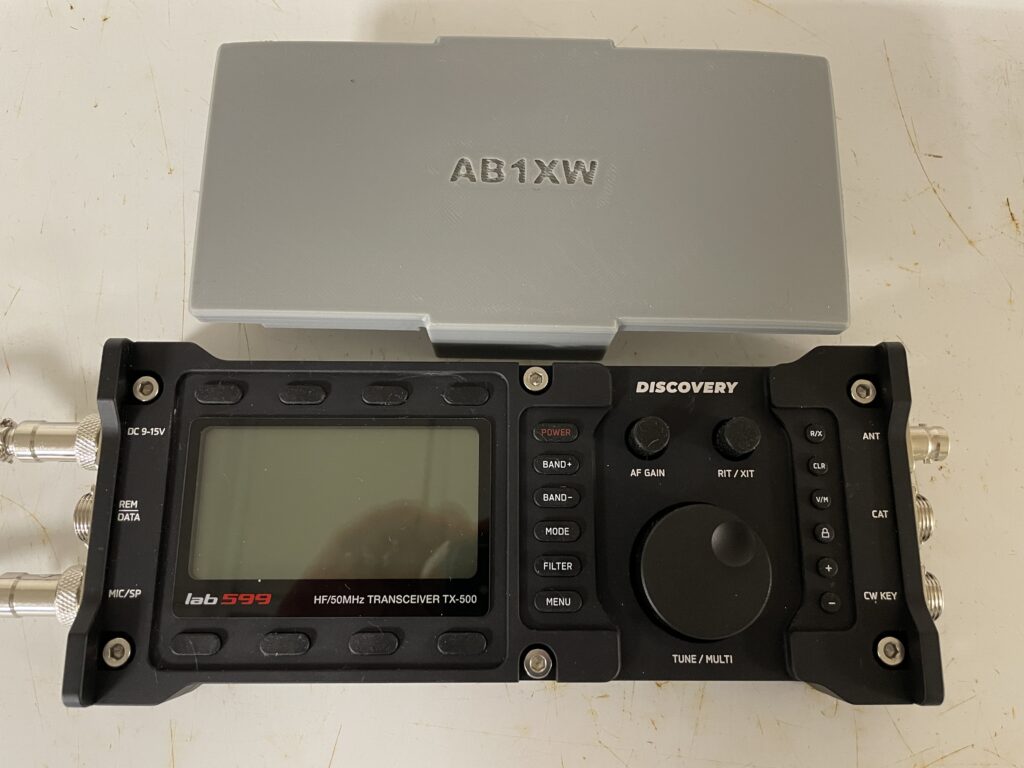
This, for example, is a protective cover for one of my portable ham radio transceivers. The STL file was created by someone else, but it was easy to emboss my callsign on it before printing.